Landscape paintings have captivated artists and art lovers for centuries. Whether it’s the breathtaking vistas of nature, the intricate play of light, or the emotion evoked by a serene scene, landscapes offer endless inspiration. For aspiring and experienced artists alike, creating a stunning landscape painting requires not only skill but also a deep understanding of composition, color theory, and technique.
This article delves into the essential techniques and tips for mastering landscape paintings, with expert advice, examples, and insights to help you enhance your art.
1. Choosing the Right Composition for landscape paintings
A successful landscape painting begins with a strong composition. The way elements are arranged in your artwork determines how the viewer’s eye moves across the canvas and how effectively the painting conveys emotion.
1.1. Rule of Thirds
The rule of thirds is a classic compositional technique where the canvas is divided into a 3×3 grid. Key elements of your painting, such as a mountain or a tree, should be placed along these lines or at their intersections. This creates balance and harmony, making the painting more visually appealing.
Example:
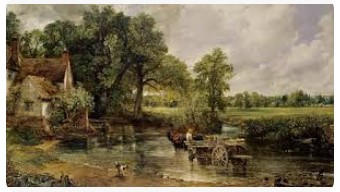
In The Hay Wain by John Constable, the horizon sits roughly along the top third of the painting, while the wagon and trees are placed near the left-hand third. This strategic placement guides the viewer’s eye through the scene.
1.2. Leading Lines
Leading lines are visual paths that draw the viewer’s attention into the painting. These can be natural elements like rivers, roads, or tree branches, which direct the eye toward the focal point of the artwork.
Tip: Incorporate winding rivers or pathways to create depth and perspective, making your landscape appear more three-dimensional.
1.3. Foreground, Middleground, and Background
A strong landscape painting should have a clear separation between the foreground, middleground, and background. This layering technique adds depth and dimension, giving the viewer a sense of scale and distance.
Pro Tip: Include larger, more detailed objects in the foreground to anchor the scene, and gradually reduce detail as objects recede into the distance.
2. Understanding Color and Light
Color and light are critical components of landscape paintings. Mastering the use of these elements allows you to create mood, atmosphere, and realism.
2.1. Color Temperature
Colors are typically divided into warm (reds, oranges, and yellows) and cool (blues, greens, and purples). Warm colors tend to advance toward the viewer, while cool colors recede, helping create depth in your landscape painting.
Tip: Use a warm color palette for foreground elements and cooler tones in the background to emphasize depth and distance.
2.2. Atmospheric Perspective
Atmospheric perspective is the effect the atmosphere has on the appearance of objects as they recede into the distance. Distant objects appear lighter, less detailed, and cooler in color. This technique helps artists create a sense of vast space.
Example:
In Wanderer Above the Sea of Fog by Caspar David Friedrich, the mountains in the distance are lighter and less detailed than the central figure, creating a sense of depth and scale.

2.3. Capturing Natural Light
The time of day greatly influences the color and lighting in your landscape. Dawn, dusk, midday, and overcast conditions all create different lighting effects. Pay attention to shadows, highlights, and the direction of light to enhance the realism of your work.
Tip: For a sunset scene, emphasize the warm oranges and reds in the sky, while using cooler purples and blues for the shadows in the landscape.
3. Mastering Brushwork and Texture
The way you apply paint—your brushwork—can drastically affect the mood and texture of your landscape painting. Experimenting with different tools and techniques will allow you to add variety and interest to your artwork.
3.1. Dry Brush Technique
This technique involves using a brush with very little paint to create rough, textured strokes. It’s ideal for depicting elements like tree bark, rough rocks, or grass. The dry brush method adds a tactile quality to your painting, making it more engaging.
3.2. Impasto Technique
Impasto is a technique where paint is applied thickly, allowing brushstrokes to remain visible. This technique adds texture and dynamism to landscape paintings, making elements like clouds, waves, or mountains appear three-dimensional.
Example:
Vincent van Gogh often used impasto to create thick, expressive strokes in his landscapes, such as in Wheatfield with Crows.
3.3. Glazing
Glazing involves layering transparent or semi-transparent colors over dried paint. This technique allows you to build depth and adjust colors without obscuring underlying details. It’s particularly effective for creating a luminous atmosphere in skies or water.
Tip: Use glazing to subtly adjust the color of your landscape, ensuring harmony between different areas of the painting.
4. Selecting the Right Tools
The tools you use are just as important as the techniques. Different brushes, canvases, and paints yield varying results, so it’s important to select the right ones for the type of landscape you want to create.
4.1. Brushes
- Flat brushes are great for broad, sweeping strokes and creating smooth skies or water.
- Round brushes are versatile and can be used for detailed work such as painting trees or rocks.
- Fan brushes are perfect for painting foliage or textured grass.
4.2. Paint Types
- Oil paints offer rich, vibrant colors and longer drying times, allowing for detailed blending and layering.
- Acrylic paints dry faster, making them ideal for artists who prefer quicker results, but they can also be layered to mimic oil paints.
- Watercolors are more fluid and require a different approach, but they can create stunning atmospheric effects, especially for misty or cloudy scenes.
4.3. Canvas or Paper
For landscape paintings, the surface you choose can make a big difference. Canvas is ideal for oil and acrylics due to its durability and texture. Watercolor paper is the obvious choice for watercolors but can also be used with acrylics for a different effect.
5. Planning and Practice: Keys to Success to landscape paintings
Even experienced artists plan their paintings carefully. Before starting on a final piece, consider sketching thumbnails to map out the composition, experimenting with color palettes, and practicing your techniques.
5.1. Observation and Reference
Spend time studying real landscapes or photographs for inspiration. Pay attention to the details—how light hits a surface, the way trees move in the wind, or how water reflects its surroundings. Observing nature closely will make your landscape paintings more authentic.
5.2. Patience and Persistence
Like any skill, mastering landscape painting takes time and practice. Be patient with yourself as you experiment with different techniques, tools, and styles.
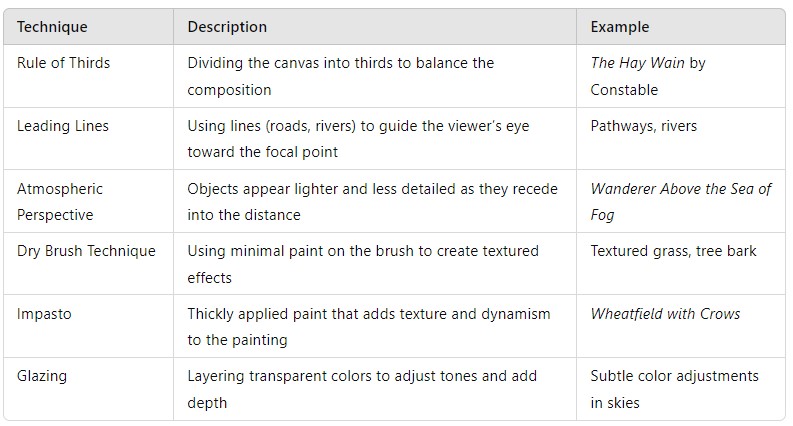
Table: Key Techniques for Landscape Painting
Conclusion: landscape paintings
Creating stunning landscape paintings is an art form that blends technique, creativity, and observation. By focusing on composition, understanding color and light, experimenting with brushwork, and selecting the right tools, you can develop your skills and produce captivating pieces. Whether you’re an aspiring artist or a seasoned painter, these tips and techniques will help elevate your landscape painting to the next level.

